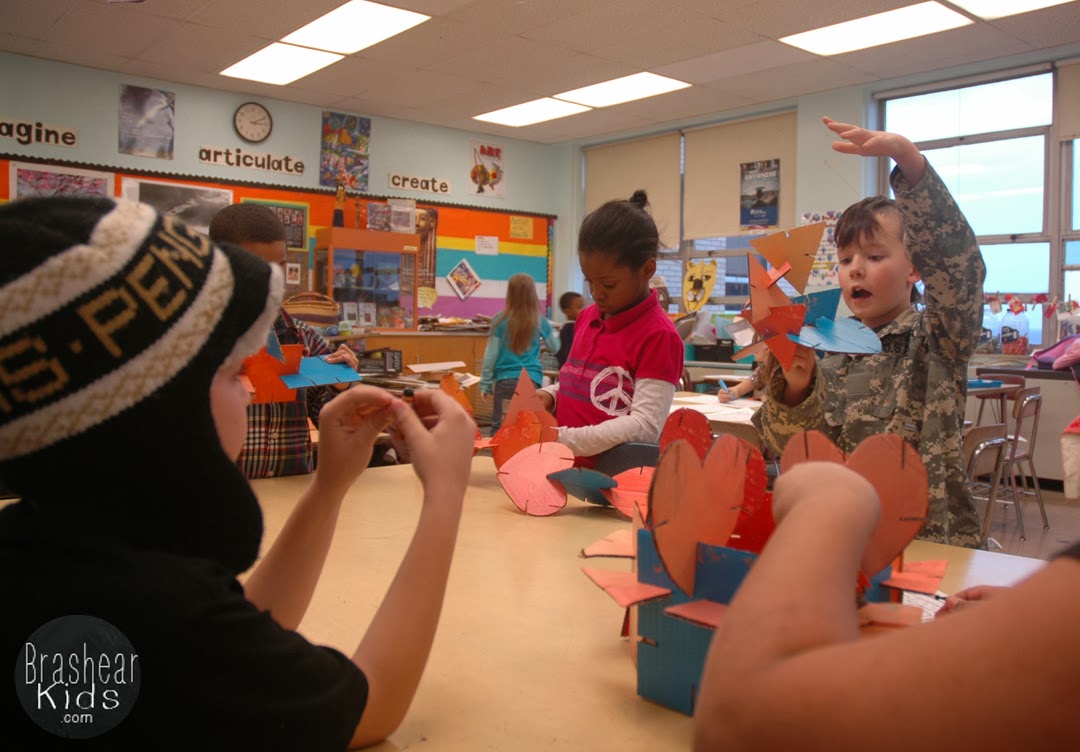
Having stations is a major component of our 2nd and 3rd grade program at Allentown Academy. It is how we begin our time together: gathering in the library and doing a different activity at each table. I like to have some stations reoccurring, and others that are planned for that day only. I've found that its important to have a variety of activities that are easily self-directed and can grab the students' attention. Here are 10 stations that worked especially well for us!
1. Make Design Spinners. We used white circles of cardstock that were cut from paper plates, after we cut the outside parts to make dreamcatchers. We colored designs on both sides of the paper circle, focusing on bright colors and patterns. Then we made two hole punches on opposite sides of the circle, threaded a length of cord between them and made the circles spin by twisting and releasing the cord. The circle should spin fast enough so that the two sides blur together and form an optical illusion. You can make a similar project with this Flying Hummingbird spinner tutorial.
2. Create a Disguise. This was very popular with my students, especially when I brought out my camera and it morphed into a photo booth station. You can have students draw their own disguises, or there is a free printable disguise kit available online, from Design House Digital. After cutting out glasses and various styles of facial hair, we had our students tape the disguise pieces to bamboo sticks and pose for the camera.
3. Make a Weaving. There are a lot of great weaving projects to try. We made a simple loom by cutting slits on the top and bottom of a piece of cardboard. A piece of string was then wrapped through each of the slits, creating the warp threads. The student can then take a piece of yarn and weave it in and out, technically known as the weft threads. The colors of the yarn can be changed for a striped weaving. Once the loom is full, you can take the weaving off by cutting the bottoms of the weft threads. Be sure to tie the weft threads together or else your weaving will unravel.
4. Make art journals. It's good to make this a reoccurring station. Each of our students has a blank notebook that they are free to fill with art experiments. Often I will set out different supplies or demonstrate a technique. For example, I brought watercolors and salt and showed how you can sprinkle the salt to make a dappled effect. Other techniques include collage, crayon resist with watercolor, and making a drawing with white glue, letting it dry, and then filling it in with watercolor. Check out a more detailed Art Journal DIY on our blog here.
5. Building Cards. You can make these out of cardboard, and with pretty much any geometric shape. I cut out rectangles, triangles and hearts, all of the same size. I then cut uniform inch-long slits on each of the sides. You want to make sure that the slits are on the same places on each of the cards, so they can interlock. It's helpful to draw a template and then trace it on each of the cards. I then painted both sides of the cards to make them bold and colorful. The students had a lot of fun building structures out of the shapes!
6. Marble Painting. This is a messy station, so be sure to protect your tables. We placed pieces of paper in aluminum trays, and rolled marbles around in different colors of tempera paint. The students then rolled the marbled back and forth over their paper. They enjoyed it so much that they created a lot of depth with the marble trails. Also, when the paper dries, we used it in a lot of art projects... it makes great collage material.
7. Make Box constructions. I saved a lot of empty cardboard food boxes and cylinders--tea, cornstarch, crackers, cereal, spaghetti, oatmeal--and brought them to our program when I had a collection of a variety of sizes. Armed with some tape, my students were eager to combine the boxes and make their own creations. Some made tech gadgets, some made instruments, and some made skyscrapers. This is also a great station for teaching recycling.
8. Make Maracas. Mini water bottles make excellent maracas. I was inspired by Tiny Tapping Toes's tutorial on waterbottle maracas. After you fill the waterbottle with your small noise-making material (we used beans, but you can use a myriad of things), we took strips of flexible cardstock, rolled them and inserted them into the waterbottle's mouth. You can secure it with tape. We also tried making rattles out of egg cartons that were attached to popsicle sticks, as you can find on Crafts-N-Things for Children.
10. Solve a giant wordsearch. My students enjoy normal size puzzles, but overlarge wordsearches are especially popular and can involve a group in solving it. I try to make one that has words from something we are learning about. For example, I made a Dios de los Muertos giant wordsearch. I make one online on a wordsearch generator, print it out and carefully transfer it letter by letter onto a large piece of paper, using a ruler to keep my lines of letters even and covering up the other lines so I don't make errors.
I usually base the stations on a theme for the week. Stay tuned for a more detailed How-To on my themed stations.
-Laura


At this page pro-academic-writers.com collected numerous tips for writers, bloggers, teachers and students for improving their writing skills
ReplyDeleteThese activities are very interesting and funny for kids
ReplyDeletekids Kindergarten