

"I leave you my portrait so that you will have my presence all the days and nights that I am away from you." - Frida KahloWe're starting off 2015 at the New Artist after school program with studying Realism... more specifically, Self-Portraits. For many elementary students, realism is really cool to look at but frustrating to try for themselves. It's a challenge but it all starts with taking that first step. We're not going for perfection, we're going for learning and trying new things.
Also, I want to note, this was an intentional lesson for our students to cultivate their creative eye and get them started on the application requirements for the Pittsburgh Creative and Performing Arts 6–12 (CAPA), a local magnet school located in the Cultural District of Downtown Pittsburgh. Since, many of the students from Phillip's Elementary apply to CAPA and "a self-portrait in pencil done from observation (looking into a mirror)" is a requirement, I decided Realism would be our first focus of the semester.
Let's jump in!
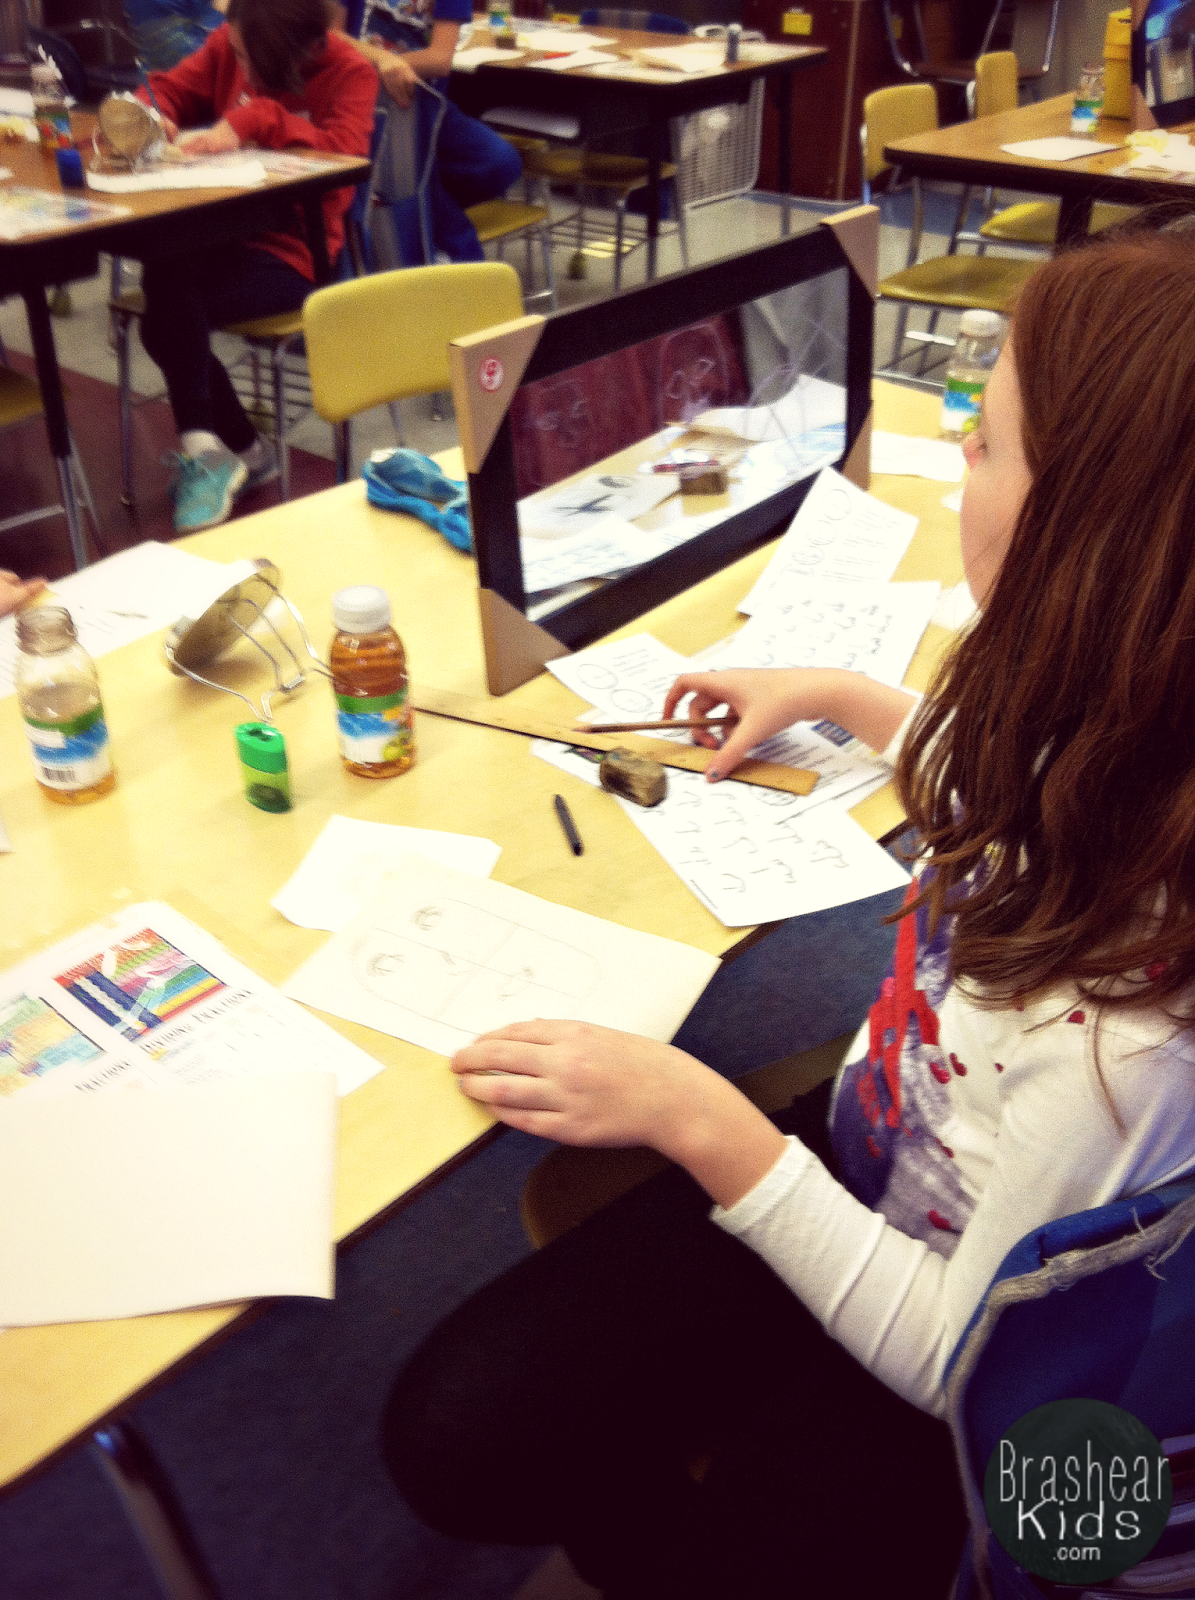
It's an involved process to teach young kids to draw a realistic face. First, our students needed to practice! Using mirrors, newsprint, graphite, erasers, and a tips handout; we studied the human face.

Self-Portrait Lesson:
The lesson was split into 3 parts. But, before I get into what we did let me share what we started with. I gave each student 3 pieces of paper, 1 pencil, 1 eraser, 1 crayon, 1 ruler and 1 mirror.

First, students drew their face using a mirror for reference. This was to get a base level of their drawing skills and so they can stretch their creative minds. I think it's important for students to be able to see improvement in their skills. Throughout the lesson the students compared their new drawings to their original. Not only does this help the students, but it helps me assess the lesson qualitatively as well.

Second, students used a crayon and a mirror to outline their facial features. Students then compared their first drawing to their outline on the mirror. We discussed the similarities and differences. What shapes are involved? Where are the eyes located on the face? How wide is our mouth compared to our nose and eyes? These are the questions I wanted to challenge the students to think about.
While they were going through this process we discussed their observations. One student mentioned,
My eyes are half way down my face.This was one of the main concepts I wanted them to learn! Many young children tend to draw eyes far up on the face and that squishes the top part of the face and makes the bottom part really elongated. Since our lesson is on realism and how to make a realistic self-portrait, I wanted to challenge them to learn the structure of the face. For a link to the handout I provided the students click here.
You can see an example in the photograph below. The drawing on the right was this students 1st attempt and the drawing on the left was her 2nd attempt. You can see the face is more centrally aligned and symmetrical!
 Third, students were given a handout that explained 6 steps of drawing a face. Using their new findings and knowledge they were challenged to draw their face a 2nd time. We then discussed the differences between their first drawing and their second drawing. For the rest of the class time, they completed a third drawing for extra practice! (You can't go wrong with more practice.)
In the photograph below, you can see this student has really integrated the rules she learned about the face into her practice self-portrait. Her face is symmetrical, her nose is realistic, and she even captured the shape of her head quite amazingly! What an awesome job!

What I Observed:
I had a mixed reaction with my 3rd and 4th grade students. A few really liked being able to focus on making their drawing as realistic as possible and enjoyed pushing themselves to erase lines, try again, and adjust. However, a few students were quite frustrated and even temporarily "quit" before trying again.I'll admit, it's not only difficult to learn but it can be challenging to try and teach 3rd and 4th grade students these concepts. I really had to get a feel for where each student was in their artistic development in order to help them. I found myself giving some one-on-one attention on this day to students who were frustrated or confused. Even though they are being challenged, support is so important to provide!
Patience.. Patience.. Patience! Self-portraits aren't easy. Students have to forget about what they know about the face and almost re-learn how to see and observe their own faces. That's a difficult thing to do. Students need to be reminded, this isn't about perfect, it's about growing as an artist!
Helpful Self-Portrait Resources:
Portrait Drawings by Everyone Can DrawHow to Draw a Pretty Face by KatCanPaint
Drawing People Summer Art Class - Day 3 by T Matthews Fine Art
Self Portrait Drawing for Kids by PixGood
Remember the most important thing about self-portraits is to... HAVE FUN! Stay tuned for our Self-Portrait Day 2 follow-up post.
- Corey
I really thank you for the valuable info on this great subject and look forward to more great posts. In today's ever-evolving world, students' ability to type fluently enables them to focus on how to type. How to type. Being able to quickly share ideas and send them to teachers anywhere is more efficient than using paper and pencil. Touch Typing Practice for wpm test score
ReplyDeleteWe read your article and are happy to tell you that your article is very good. Hopefully, you will keep bringing articles like this. We have an article about comping tent so read it. We hope this will be useful for you.
ReplyDelete5. This site is amazing, all the information is very valuable. You have written a story. You've edited it, spent some time revising it, but how does it flow? What does that little voice in your head tell your eyes? Because at the end of the day, if you are wondering how to do voiceover, How to record voice over youtube video this article can easily provide you all the information you need. Tips on how to record voice on YouTube video are given in this which is very important. Enjoy it by reading the full article.
ReplyDeleteThis is a really good idea especially for those new to the blogosphere. Short but accurate information Thank you for sharing this. Posts to read! I share a very authentic post you can read where you can find out Space Key Not Working on Windows 10--Here's a Quick Fix. Please refer to the article best space bar counter
ReplyDeleteHello, I enjoy reading all of your article. In playing any game the dice roller is the most important part of the players. During this time you can refer to the online roll dice blog and enjoy the game.
ReplyDelete